This article is for creating assignments in Blackboard Ultra. For the corresponding Blackboard Learn Original page see Creating Hypothesis-enabled Readings in Blackboard Learn Original.
Note: The following assignment creation workflow assumes that an administrator has previously added Hypothesis as an LTI Course Content tool as described in Installing the Hypothesis LMS app for Blackboard: Administrator Guide.
1. Add a new Course Content item
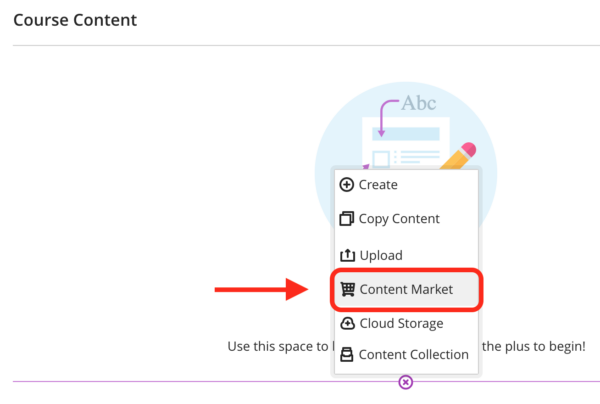
From the Course Content page, click on the plus (+) icon to show the Create Content menu. Select Content Market.
2. Find the Hypothesis tool and click the “+” button
Under Institution Tools locate Hypothesis and click the plus (+) icon in the lower right corner. Note: Do not click anywhere else on the Hypothesis panel but the small plus icon.

3. Edit the assignment name and settings
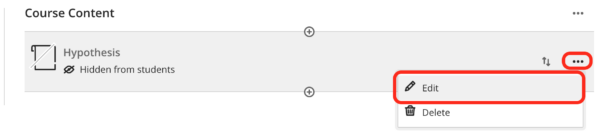
A Hypothesis content item should now be visible on the Course Content page. Click the 3 dots on the right side of the Hypothesis entry and select Edit.
Change the name of the Hypothesis assignment to something appropriate. Check the box to Create gradebook entry for this item if desired, and set the grading options.
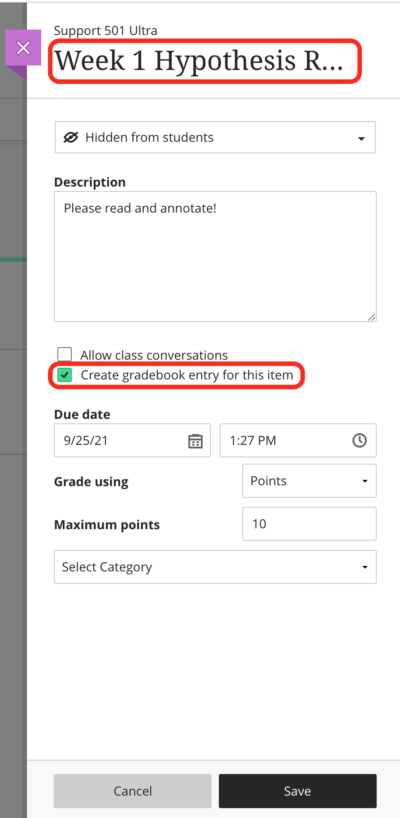
Click Save when finished.
4. Click on the newly created content item to finish configuring your Hypothesis assignment
You will have the option to enter a publicly-viewable URL, select a PDF from your Blackboard course files (if enabled for your school), select a PDF from Google Drive, or select a PDF from OneDrive.

Expand the sections below for instructions to use each option:
Notes:
PDFs must have optically recognizable text in order to be annotatable in the Hypothesis app. If you can select text in the PDF, no further action is needed. If you can’t select text in the PDF, you’ll need to follow our instructions for how to OCR-optimize a PDF.
Click the button that says Enter URL of web page or PDF. On the Enter URL dialog, enter a link to a public web page or PDF. Please note that the content at the link must be publicly viewable (i.e., not behind a login or paywall).

Click the Submit button.
Note: This option is only available if a Blackboard REST API integration has been enabled for your school.
Before using this option, we strongly recommend following the instructions provided here to ensure that the PDFs have been configured with the proper permissions for use with Hypothesis.
Click the button that says Select PDF from Blackboard. You will then be able to browse your Blackboard course files to select the PDF you wish to use in the Hypothesis reading.
Highlight the file you wish to use and click the Select button.

Click the button that says Select PDF from Google Drive. You will be asked to select a Google account and/or authorize the Hypothesis LMS App to access Google Drive. To use an institutional Google Drive account you need to already have the ability to share documents with users outside your organization.
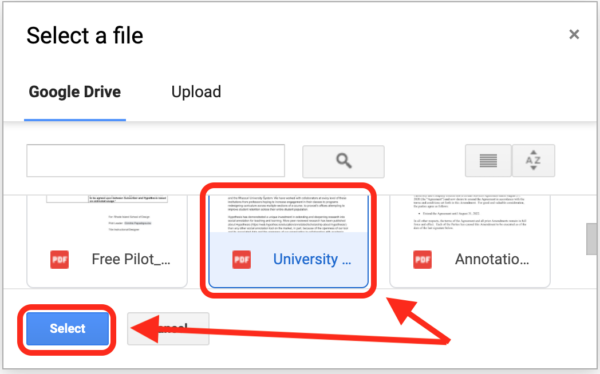
Search or browse to select a PDF to use in your reading. You may also click the Upload tab to upload a new PDF to use.
Only files for which you have edit permission are able to be used by Hypothesis.
Click on the file you want to use and then click the Select button.
Note: This process will change the sharing permission of the selected Google Drive file to allow the PDF to be shown to anyone viewing the assignment. For more information please see our document about using Hypothesis with Google Drive.
Click the button that says Select PDF from OneDrive. You will be asked to select a Microsoft account and/or authorize the Hypothesis LMS App to access OneDrive. To use an institutional OneDrive account you need to already have the ability to share documents with users outside your organization.
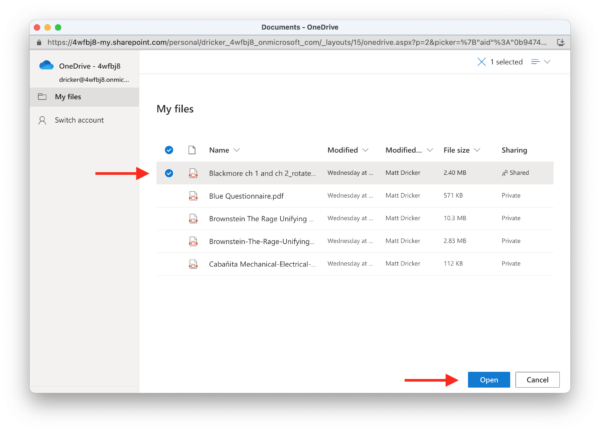
Once logged on, browse to select a PDF to use in your reading. You may also select the Upload option to upload a new PDF to use.
Only files available in “My files” are able to be used by Hypothesis. You will be unable to use PDFs that belong in any Shared Libraries.
Click to select the file you want to use and then click the Open button.
Note: This process will change the sharing permission of the selected OneDrive file to allow the PDF to be shown to anyone viewing the assignment. For more information please see our document about using Hypothesis with OneDrive.
When selecting a text from JSTOR it must be one that your school has license to access, and you must use the JSTOR stable URL. Complete instructions here.
Find and copy the Stable URL of the article you will be assigning from JSTOR.org. The stable URL is listed as part of the content metadata section of the page, usually under the title, author, and journal information.
Select the JSTOR article option in the Hypothesis picker during the assignment creation process and paste the stable URL into the text field. Click the right arrow and then accept JSTOR’s terms of use.
![]()
When selecting a text from VitalSource it must be one that your and your students have access to independent of Hypothesis. Complete instructions here.
Open your VitalSource bookshelf, and then find and copy either the text’s VBID or the text’s URL.

Select the VitalSource article option in the Hypothesis picker during the assignment creation process and paste the VBID or URL into the text field. Click the right arrow and then the “Select Book” button.

In the next screen select the starting point of the assignment (for example, you may have a specific assignment start on the book’s 2nd chapter instead of starting at the beginning of the book for every assignment).
With the starting point selected, click the Select button.
5. Indicate if this will be a Group assignment
Note: This option is only available if a Blackboard REST API integration has been enabled for your school.
By default your Hypothesis reading will make all annotations visible to all students in the course.
You have the option to allow the creation of reading groups based on a pre-existing group set. To enable this, check the box to indicate This is a group assignment, then select the appropriate existing group set from the drop-down list.
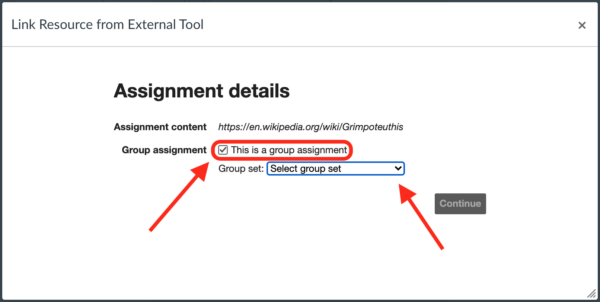
If you do not want to designate the reading as a groups assignment, leave the Group assignment box unchecked.
Click the Continue button.
6. Preview your Hypothesis-enabled reading
The reading should now open with the Hypothesis sidebar loaded.
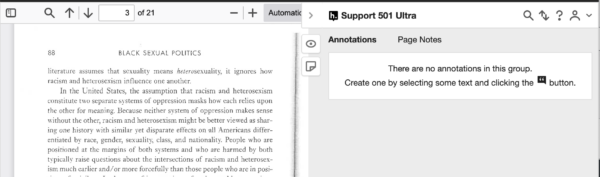
You and your students will now be able to select text and annotate.
Edit and reconfigure the Hypothesis reading assignment
At any time you can reconfigure the Hypothesis reading assignment to use a new document or group set:
- With the reading assignment open, click Edit next to the assignment name in the Grade Bar

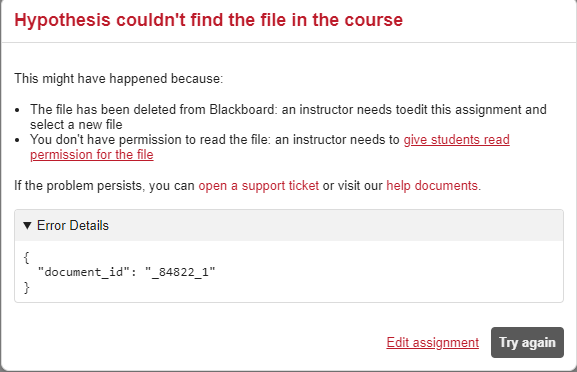
- If the assignment will not open and shows an error message, you can click the Edit assignment link at the bottom of the window