Note: This feature requires that a Moodle administrator has registered an API token with Hypothesis. For other methods to implement reading groups in your LMS, see How to Assign Hypothesis Readings to Small Groups.
Hypothesis lets you create small reading groups using Moodle’s built-in Groups feature. These groups need to be placed into groupings in Moodle, which can hold one or more groups. These groupings determine which groups are used in a Hypothesis assignment.
Here is a video that demonstrates how to set up Hypothesis group assignments in Moodle. Below the video, you’ll find detailed steps for additional reference.
Some examples of the kinds of reading groups you can create:
- Have Moodle automatically create and populate groups based on either how many groups you want, or how many students you want in each group
- Create one group per student — useful for 1:1 annotation between student and instructor
- Or customize group membership in any other way that makes sense for your course and assigned readings
More information about creating and using Moodle Groups can be found here.
Create Moodle Groups and Assign Members
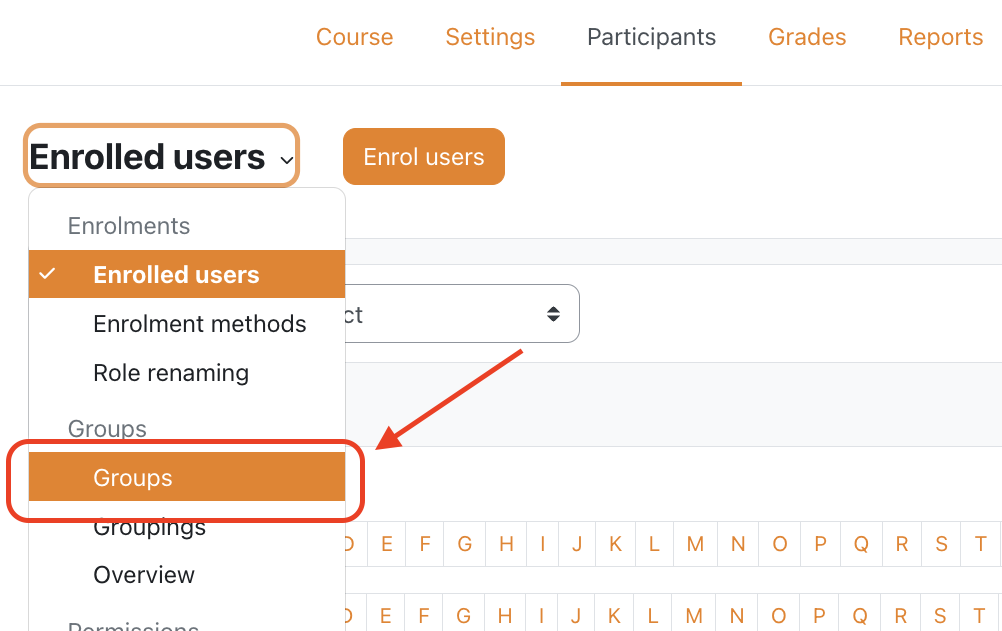
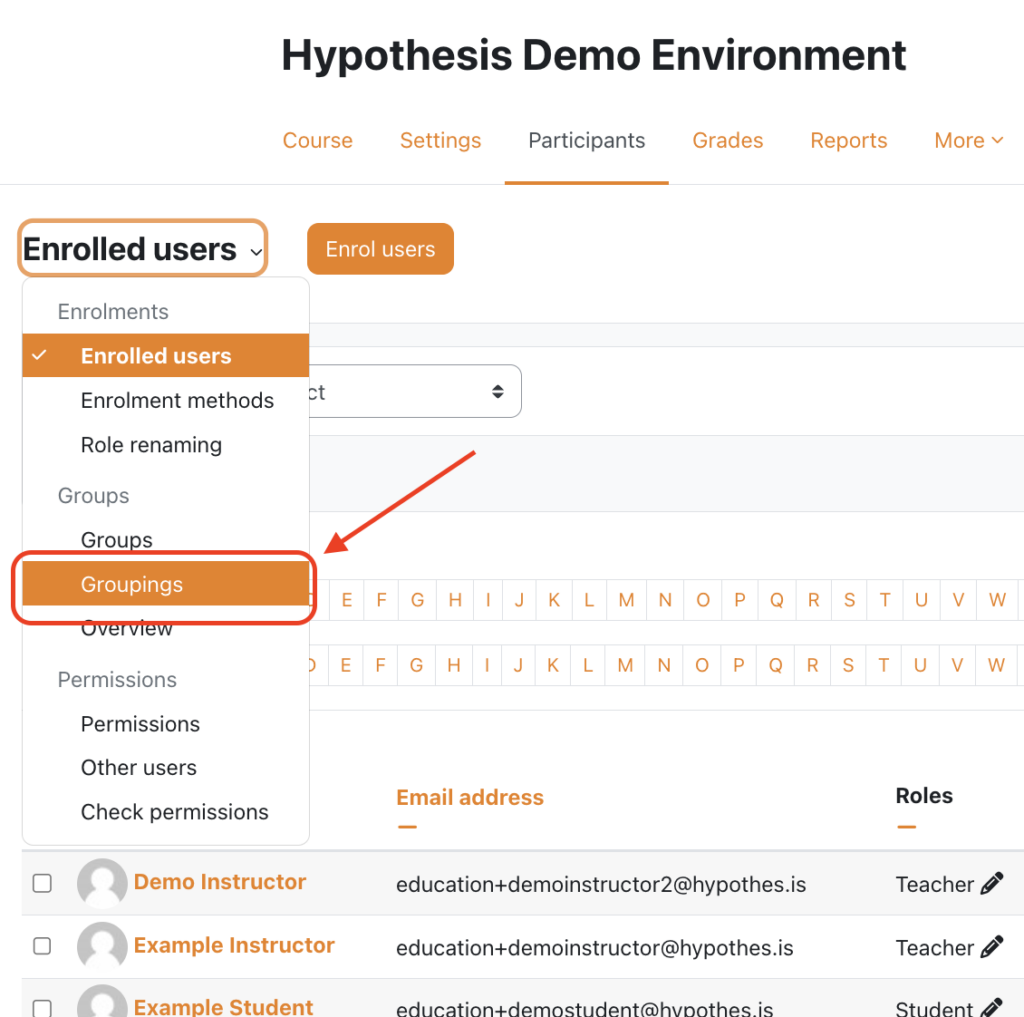
- From the course page, select Participants.

- From the Participants section, click the arrow beside Enrolled Users and select Groups.
- You can either manually create groups one at a time using the Create Group option or create multiple groups based on certain rules and assign them to a Moodle grouping using the Auto-Create Group option.
-
- Click Create Group.
- Enter a Group Name. All other fields such as Group Description are optional. For more information on the other fields, you may click the ? or the tooltip for each field.
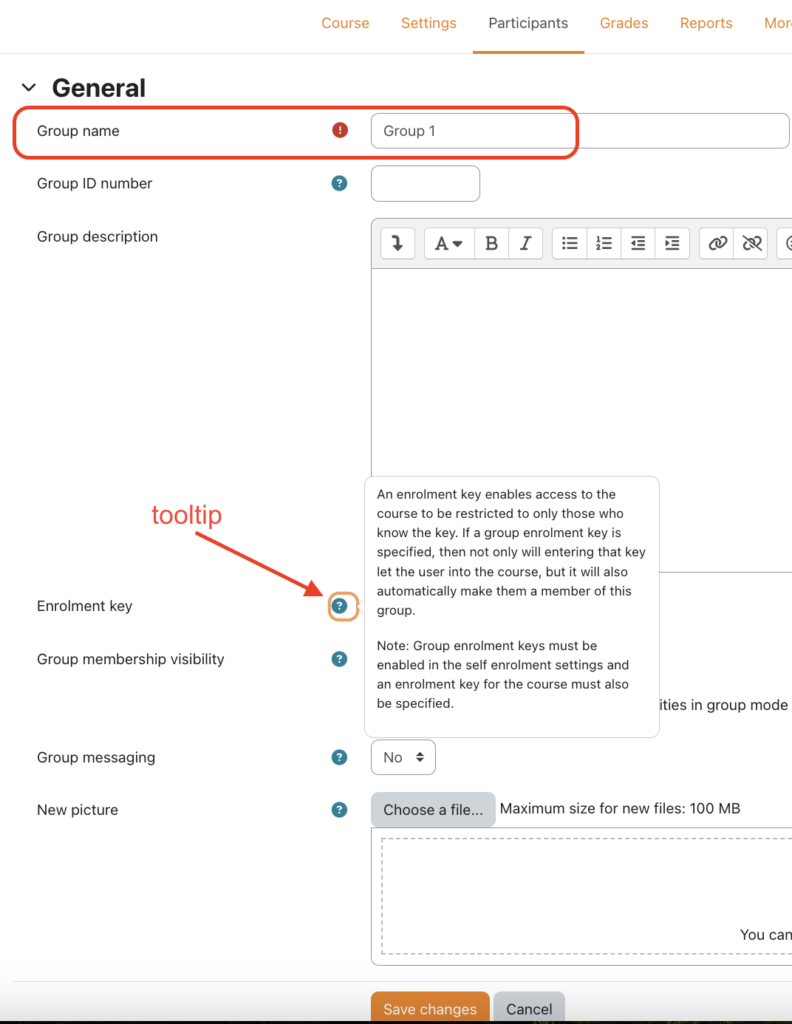
- Click Save Changes.
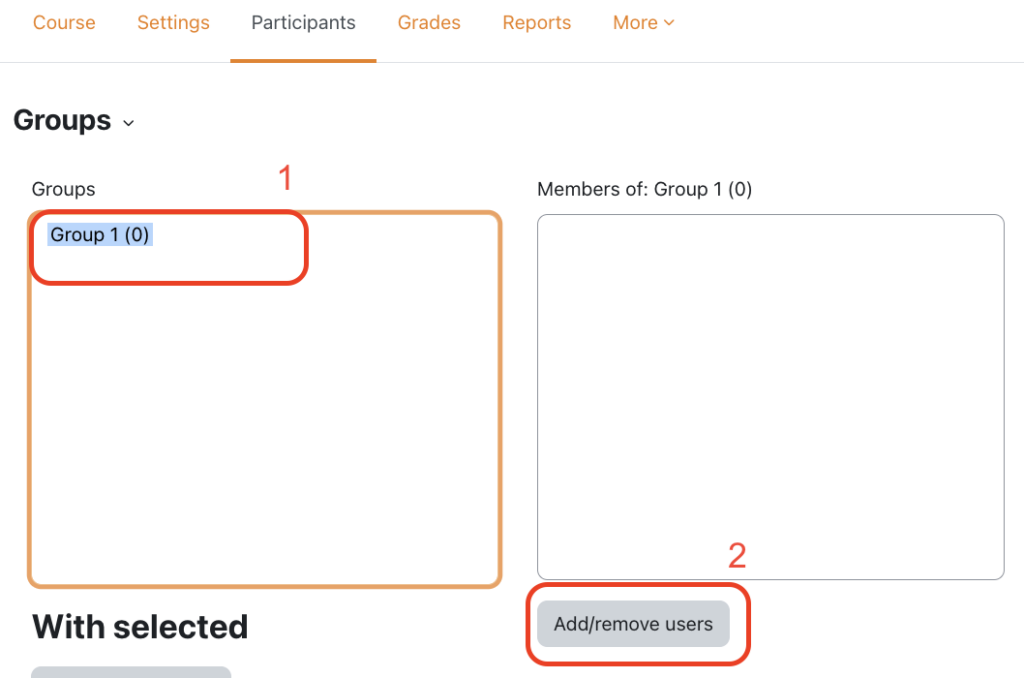
- To assign students to your group, highlight the name of the group and click Add/Remove Users.
- From the Potential Members box, highlight the name of the student you would like to be a part of the group and click Add. Repeat this process until you have assigned the desired students to the group.
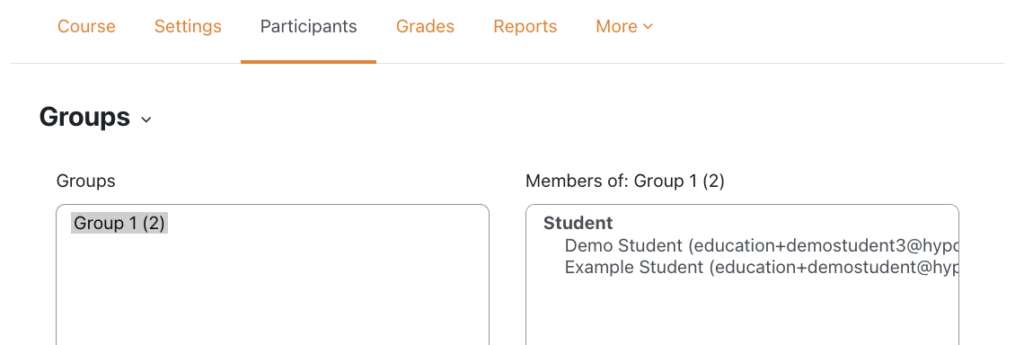
- Click Back to Groups. You will now see the members of the selected group to the right. Right after the name of the group, you will see the number of members in the group enclosed in ( ).
-
- Click Auto-Create Groups.

- Click Auto-Create Groups.
-
- In the General section, specify a naming scheme for the groups you’ll create. For instance, using a scheme like “Group #” will generate groups named as Group 1, Group 2, and sequentially. Alternatively, employing a scheme such as “Team @” will produce groups named Team A, Team B, and sequentially.
- In the “Auto-Create Based” field, you have the option to choose between “Number of Groups” or “Member of Groups“. This selection is connected to the following field labeled “Group/member count”.
-
- If you choose “Number of Groups,” the value entered in the “Group/member count” field will determine the total number of groups created.
- If you choose “Number of Members,” the value entered in the “Group/member count” field will specify the number of members per group.
-
- In the Group Members section, you can set parameters on who will be part of the group and how the member selection will be. Here’s a brief description of each item.
- In the Group Members section, you can set parameters on who will be part of the group and how the member selection will be. Here’s a brief description of each item.
-
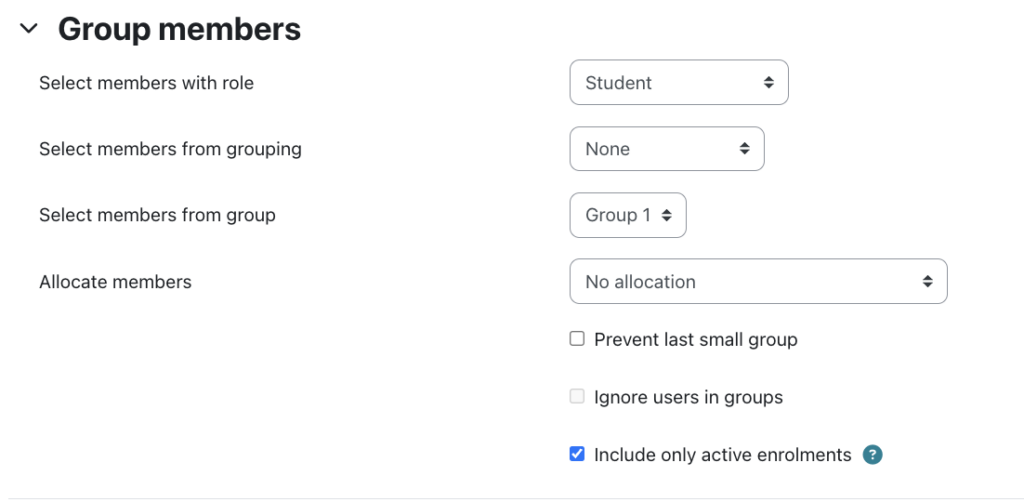
- Select members with role – determines which user roles can be included as members of the group.
- Select members from grouping – if an existing grouping exists, you have the option to allocate its members to the groups that will be created.
- Select members from group – if an existing group exists, you have the option to allocate its members to the groups that will be created.
- Allocate members – provides options for the member allocation process. You can select “No allocation” if you prefer to create the groups without assigning members at this stage.
-
- In the Grouping section, you can choose to assign the newly created groups to either an existing grouping or create a new grouping. Here’s some guidance on the options below.
- In the Grouping section, you can choose to assign the newly created groups to either an existing grouping or create a new grouping. Here’s some guidance on the options below.
-
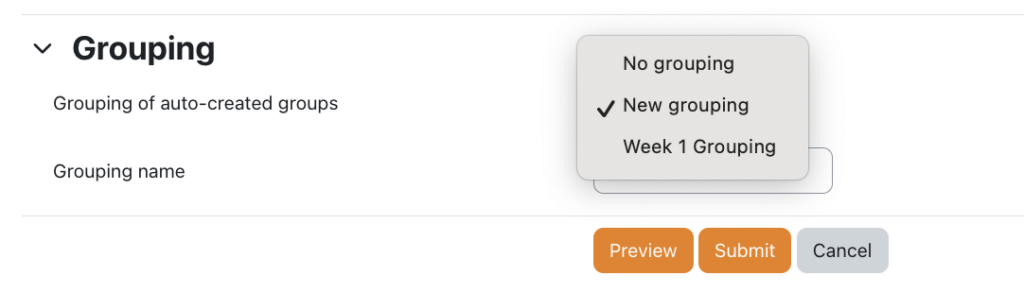
- Grouping of auto-created groups
- No Grouping – Groups will be created without being assigned to any grouping.
- New Grouping – Groups will be assigned to a new grouping, and you’ll need to specify its name in the “Grouping name” field.
- If you have an existing grouping, its name will appear in the “Grouping of auto-created groups” option. In the example screenshot above, “Week 1 Grouping” is an existing grouping that can be selected.
- Grouping Name – this field is only required when you select New Grouping for Grouping of auto-created groups.
- Grouping of auto-created groups
-
- Click Preview to see how the groups and its member allocation looks like.
- Click Submit.
Create a Grouping and Assign Groups
- Click Create Grouping.
- Give the Grouping a name and an optional description.
- Click Save and you will be redirected to the groupings page.
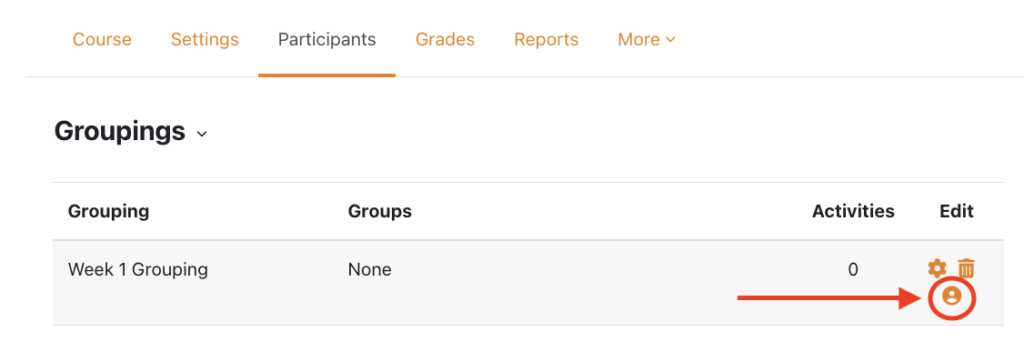
- Click the Show Groups in Grouping button.
- Highlight the groups from the Potential Members box and click Add to move them to the Existing Members box.

Create a Hypothesis Group assignment
Important: Make sure you have built and configured your Moodle Groupings and assigned groups into it before creating your Hypothesis assignment.
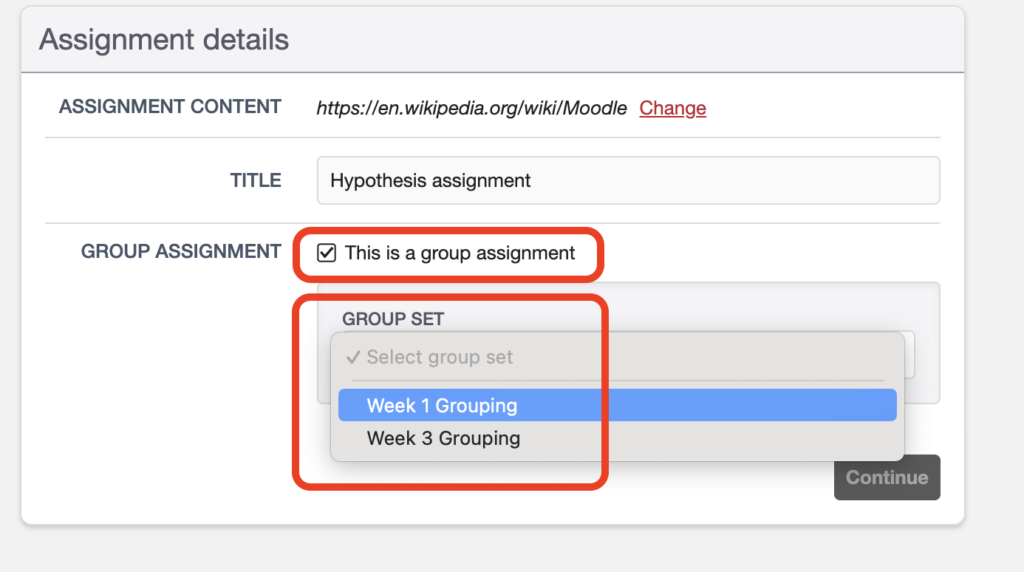
Note: The Hypothesis app refers to Group Set in the following configuration screen; this is equivalent and identical to Moodle Grouping.
When creating a new Hypothesis reading you will be prompted during set-up to choose to configure the reading as a group assignment. Check the box to indicate This is a group assignment and select from the drop-down list an existing Group Set that reflects your desired reading groups.
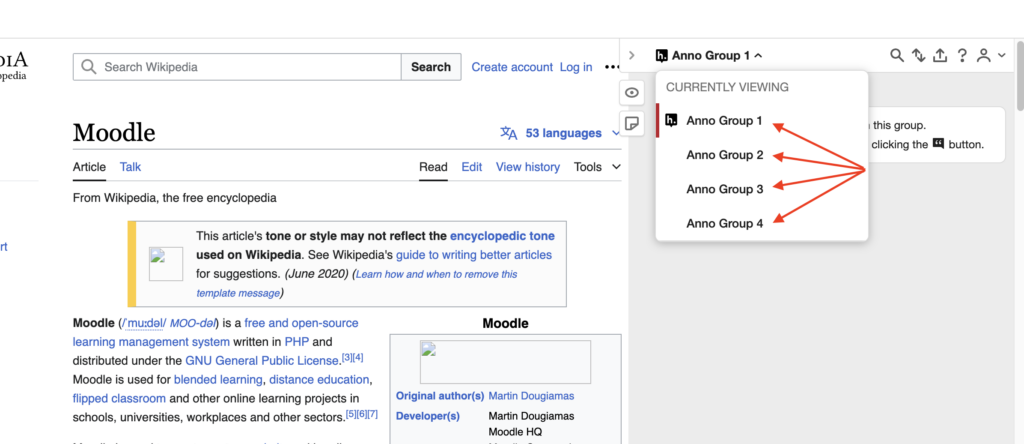
As the instructor, when you open the Hypothesis reading you will see each group listed in the drop-down at the top of the Hypothesis sidebar. To view annotations for a group, select the group name from the list.
Students opening the Hypothesis reading will only see the one group listed in the sidebar of which they are a member. Annotations they post will only be visible to other members of that group and vice versa.
Updating Moodle groups
When students are added to a Moodle course, especially after the class begins, they may not be automatically added to the Groups in your course. The course instructor will need to edit the Groups in the Group Set to put those newly-added students into a group.